
OpenStack Swift Cluster
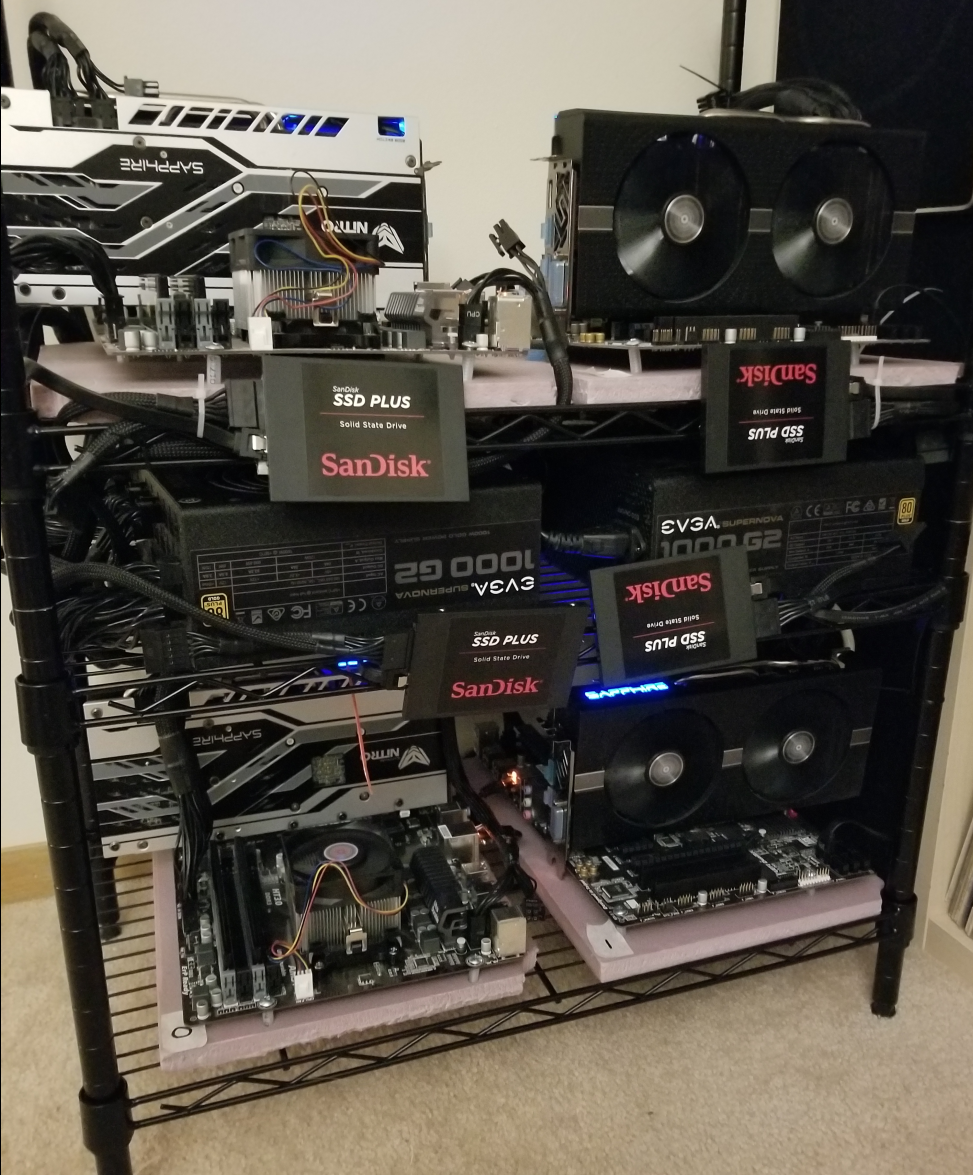
This post will give a brief rundown of my implementation of a Swift cluster. Much of my time was spent working with physical hardware. OpenStack is a very large system made of many modular components, of which Swift is just one. Swift, itself, is also built up of many parts. Each component of Swift could encompass an entire project on its own. I will do my best to touch on some of the main topics I studied, as well as the key configuration steps in building any Swift cluster.
Background
What is Object Storage?
Object storage, rather than block or file storage, allows the user to store data in the form of objects in a flat namespace using REST HTTP APIs. A user sends their GET, PUT, POST, or DELETE request to an API endpoint and the request is translated to physical nodes by the proxy/controller node which can then be used to retrieve, update, or delete objects. [3]
What is OpenStack Swift?
OpenStack Swift-like systems are an object storage method that replicates each object across multiple nodes. These systems rely on certain object-synchronization protocols to achieve high reliabilty and eventual consistency. This compromise on consistency allows swift object to be highly available. Availability refers to a storage system’s uptime and responsiveness in the face of individual component failures or heavy system load. Unstructured data usually needs to be available in an instant across a variety of devices regardless of location; users want to access their data on their mobile devices, laptops at home, and desktops at work. Although some data can be archived, many users expect most of their data to be immediately available.
Swift Architecture
Let’s look at how Swift organizes objects logically and abstracts the mapping of object to physical hardware.
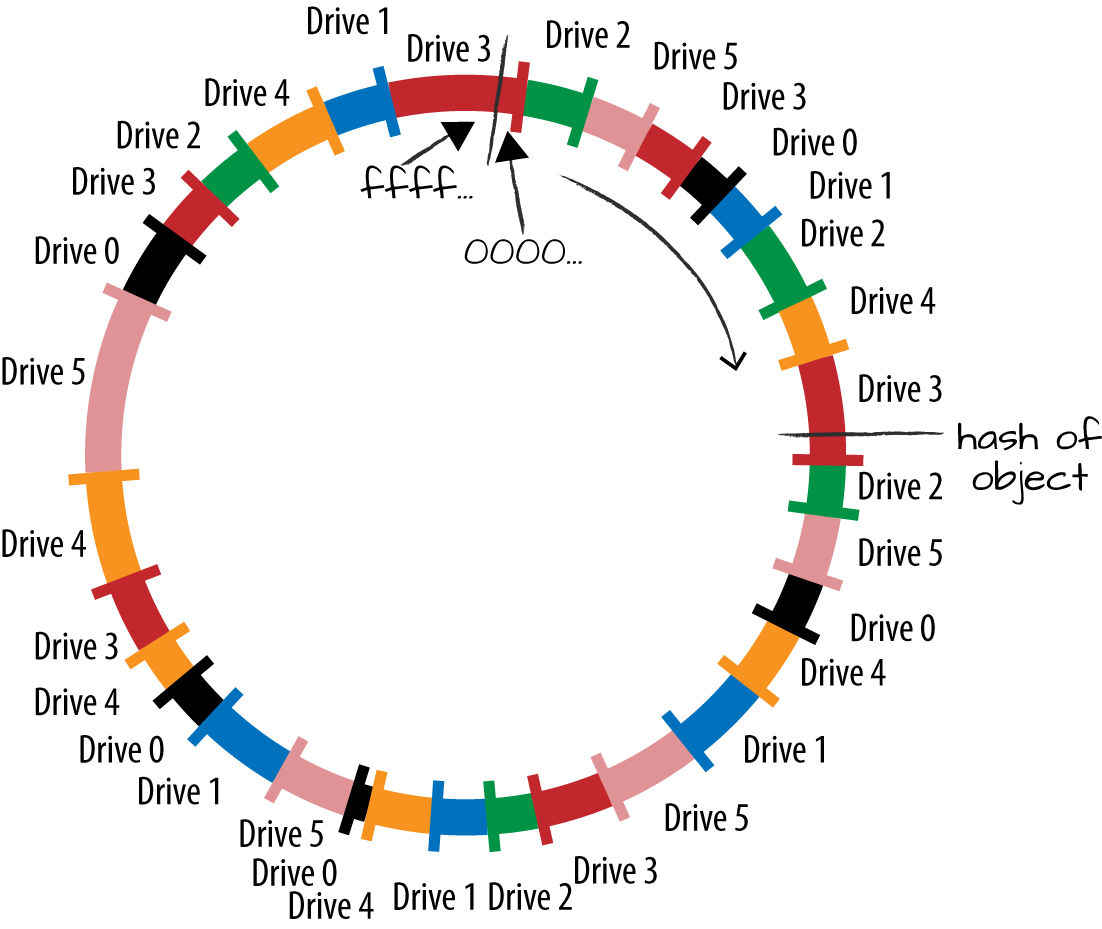
Swift has 3 main logical storage entities each organized in a
logical ring like discussed in my paper presentation: Accounts, Containers, and Objects.
Naming
OpenStack Swift allows users to store unstructured data objects with a canonical name containing three parts: account, container, and object. Using one or more of these parts allows the system to form a unique storage location for data.[1]
/account
The account storage location is a uniquely named storage area that will contain the metadata about the account itself, as well as the list of containers in the account. Each account has a database that stores both the metadata for the account and a listing of all the containers within the account. In Swift, an account is a storage account and not a user identity.
/account/container
The container storage location is the user-defined storage area within an account where metadata about the container itself and the list of objects in the container will be stored. Containers are user-defined segments of the account namespace that provide the storage location where objects are found. There is no limit to the number of containers a user may create within a Swift account. Just as each account has a database, so does each container. Each container database has the metadata for the container and a record for each object that it contains [8].
/account/container/object
The object storage location is where the data object and its metadata will be stored. Objects are the actual data being stored in OpenStack Swift such as photos, videos, documents, log files, database backups, filesystem snapshots, etc. Every object must belong to a container. When an object is stored in the Swift cluster, users will always reference it by the object storage location (/account/container/
object). There is no limit to the number of objects that a user may store within a container [8].
All of 3 parts of this canonical name make up the identifier, thus the following 3 ObjectXs are unique:
/AccountA/Container1/ObjectX
/AccountA/Container2/ObjectX
/AccountB/Container1/ObjectX
Replication
I have made a presentation on a terrific paper On the Synchronization Bottleneck of OpenStack Swift-like Cloud Storage Systems that I will make a blog post about soon. This paper covers in great detail the software design of Swift and its replication protocols. I will not discuss that here beyond pointing out that Swift uses the Linux remote file synchronization utitily rsync to achieve this.
Physical Hierarchy
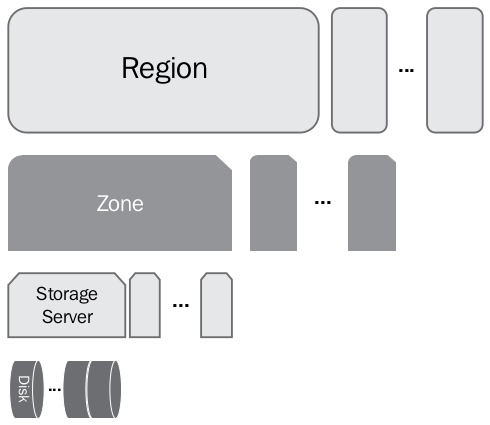
Region: At the top level, Swift stores data in regions that are ideally, geographically separated and thus suffer from a high-latency link. Unsurpisingly, my lab scale deployment used only one region.
Zone: Within regions, there are zones. Zones are a set of storage nodes that share different availability characteristics. Availability may be defined as different physical buildings, power sources, or network connections [1] zone could contain a single storage server, a rack, or a complete datacenter. Zones need to be connected to each other via low-latency links. Points of failure are often grouped into zones, so at a smaller scale this could be a rack of sotrage nodes that all have the same power supply, or servers which share a network switch etc. OpenStack recommends having at least five zones per region. For similar reason as above, my lab only specified one zone [3].
Storage servers: A zone consists of a set of storage servers ranging from just one to several racks.
Disks: Drives are part of a storage server mounted as standard volumes. I used XFS.
In small clusters (five nodes or fewer), everything is normally in a single zone. Larger Object Storage deployments may assign zone designations differently; for example, an entire cabinet or rack of servers may be designated as a single zone to maintain replica availability if the cabinet becomes unavailable, due to a switch pr power failure [3]. In very large deployments, such as service provider level deployments, each zone might have an entirely autonomous switching and power infrastructure, so that even the loss of an electrical circuit or switching aggregator would result in the loss of a single replica at most [2].
Data Services
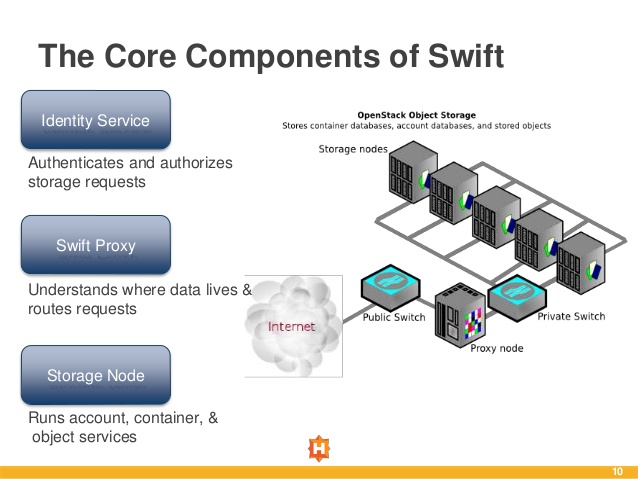
Proxy Server
The proxy server is responsible for accepting HTTP requests from a user. It will look up the location of the storage server(s) where the request needs to be routed by using the ring. A large number of failures are also handled in the Proxy Server. For example, if a server is unavailable for an object PUT, it will ask the ring for a handoff server and route there instead [5].
Account Server
The account server tracks the names of containers in a particular account. Data is stored in SQLite databases; database files are stored and replicated on the swift cluster like any other data. This server does not have any location information about containers. The location information is determined by the proxy server based on the partition ring.
Container Server
Same idea as the account server but with object names in a particular container.
Object Server
Object servers are responsible for the physical storing of objects on disk. For performance, these services are often placed on single machines.
Networking
Much of the work in getting my cluster up and running was properly configuring the necessary networks.
Public network
The proxy server connects to this network. This network provides public access to the API endpoints within the proxy server. This is an outward facing network for external (Internet and/ or clients) communication via API access. The authorization services/middleware also communicate with the proxy over this network.
Storage network
This is a private network not accessible to the outside world. All the storage servers and the proxy server will connect to this network. Communication between the proxy server and the storage servers, and communication between the storage servers, takes place within this network. Traffic on this network is not encrypted, so this network must be otherwise secured.
Manual Configuration
I installed MySQL on the proxy node for the Keystone database. After binding address, keystone can be installed on the proxy node.
$apt install keystone
There are several sample configuration files on Openstack’s Github page to use as a base.
The proxy server process is the only part of the Swift cluster that communicates with external clients. This is because only the proxy server process implements the Swift API [9].
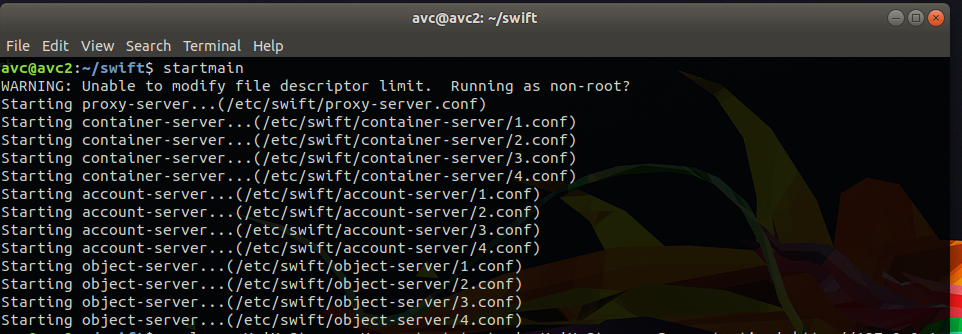
Once configured, services can be started with OpenStack Swift’s startmain command:
Install Swift Proxy
$ apt install swift-client swift-proxy memcached python-keystoneclient
$ apt install python-swiftclient python-webobb
Configure Proxy
$ mkdir etcswift
$ vim etc/swift/proxy-conf # used a sample from Swift’s Github
Once configured, services can be started with OpenStack Swift’s startmain command.
Server Processes
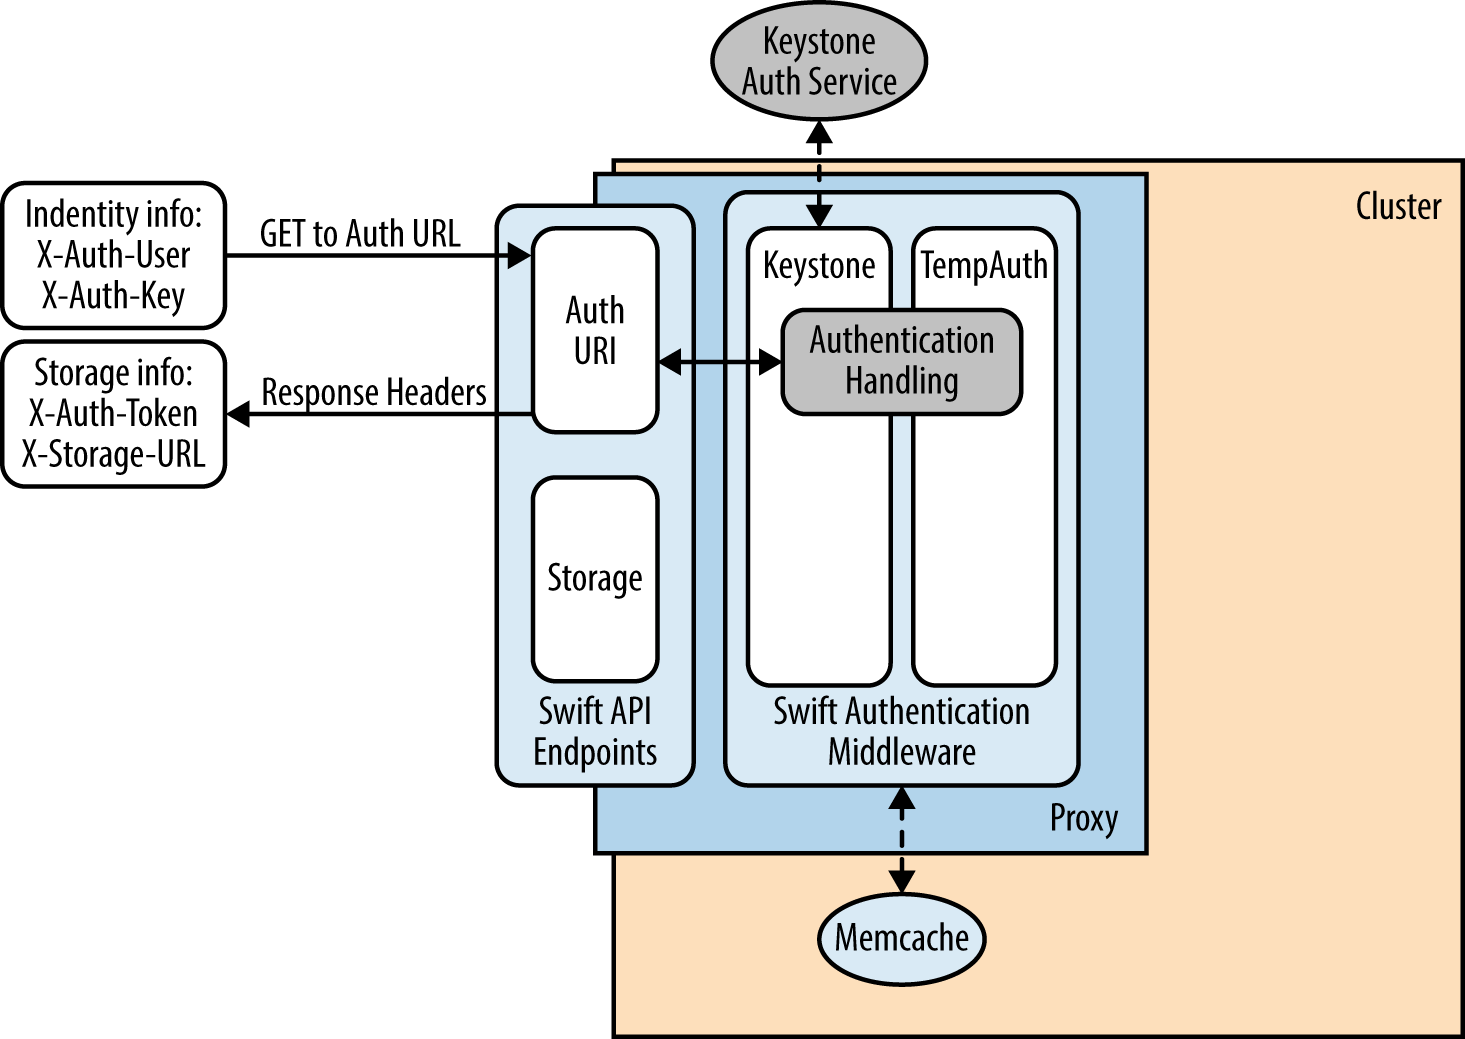
Swift can stand alone from the other OpenStack services, but some some authentication middleware is needed. This can be 3rd party or otherwise. I used the OpensStack keystone authorization service as it is a native OpenStack service which makes for the easiest configuration.
Storage Node(s)
Install account, container object services:
$ apt install swift-account swift-container swift-object
and xfsprogs for admin and debugging XFS file system tools sicne my storage drives are XFS:
$ apt install xfsprogs
You’ll then need to format and mount your storage disks, followed by configuring the rsynch config file on each storage node using the storage network IP.
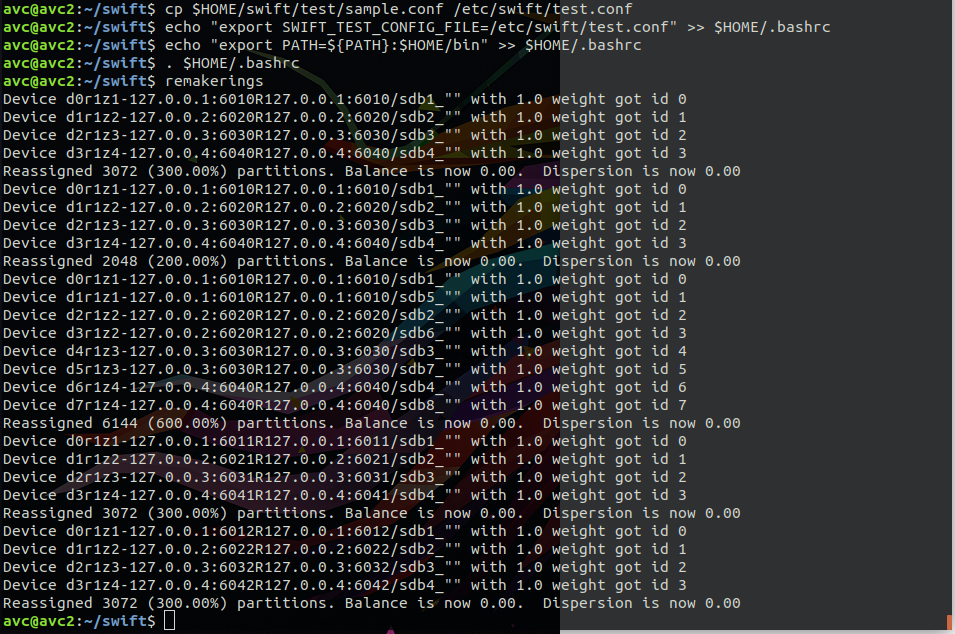
Once the storage nodes and policies have been configured (I used a sample policy script for small clusters), you can build the storage rings:
$ remakerings
Authentication and Authorization
OpenStack Keystone
I used the Keystone service for authentication. The Keystone service exposes an endpoint that a user will connect to using username and tenant credentials. After validation by the Keystone identity service, a token is returned to the user that will be cached and used in further API calls to various other OpenStack API endpoints. Within Keystone, a user is defined to have account credentials and is associated with one or more tenants. Also, a user can be given a role such as admin, which entitles this user to more privileges than an ordinary user[7]. Let us consider the case where a user is connecting to a Swift endpoint to read an object. When a user initiates an API call along with a token to the Swift endpoint, this token is passed by the Swift endpoint back to Keystone for validation. Once validated by Keystone, it returns a success code back to the Swift endpoint. The Swift service will then continue processing the API to read the object.
All authorization requests are directed to an auth URL, such as http://swift.example.com/auth/v1.0, which must be known in advance. In other words, if you are told you have been given access to a Swift cluster, you will need to know the username, password, and auth URL [3].
Using Keystone
I installed MySQL on the proxy node for the Keystone database. After binding address, keystone can be installed on the proxy node:
$ apt install keystone
Setting up Keystone auth on Swift is fairly easy. In the Swift proxy server configuration file
proxy-server.conf, add the authtoken and keystoneauth to the pipeline. Generating a storage URL and authorization token via the command-line can be used by sending a request to the auth/v1 endpoint.
Generate authentication for test user:
$ swift auth -v -U test:tester -K testing -A http://localhost:8080/auth/v1.0
Send HTTP request to get storage-url and auth token:
$ curl -v -H 'X-Storage-User: test:tester' -H 'X-Storage-Pass: testing' http://127.0.0.1:8080/auth/v1.0
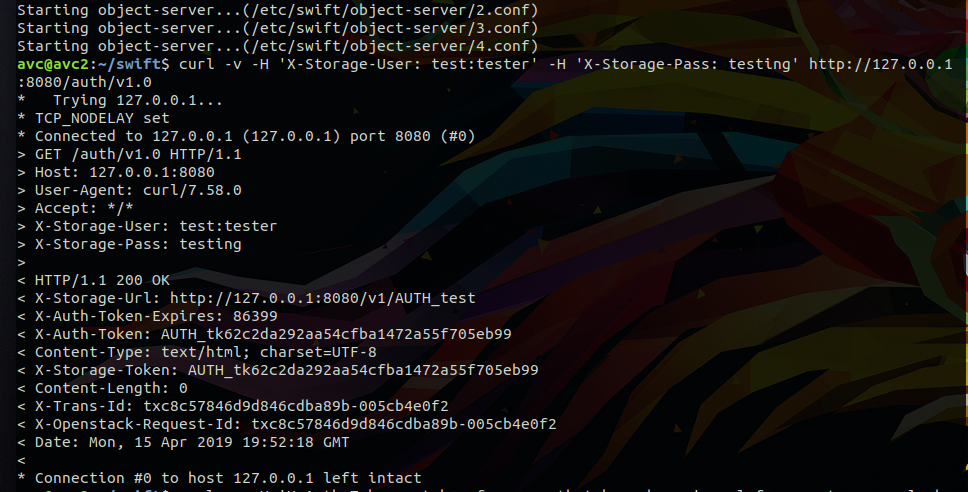
You can now use this token and endpoint to access swift accounts, containers, and objects that you are authorized to access. If the username/password combination had been invalid, we would have received an HTTP response code of 401 Unauthorized . However, we sent a valid username and password, so we received the response code 200 OK.
Using the Swift API
A client needs three pieces of information to authenticate to a Swift cluster: a username, a password, and an auth URL
Storage URLs also use the /v1 endpoint which can be accessed using the standard HTTP verbs:
GET, POST, PUT, HEAD, DELETE, COPY.
Uploading (PUT)
A client uses the Swift API to make an HTTP request to PUT an object into an existing container. After receiving the PUT request, the proxy server process determines where the data is going to go. The account name, container name, and object name are all used to determine the partition where this object will live. A lookup in the appropriate ring is used to map the storage location ( /account/container/ object ) to a partition, and to the set of storage nodes where each replica of the partition is assigned.
The data is then sent to each storage node, where it is placed in the appropriate partition. Once the majority of the writes have succeeded, the proxy server process can then notify the client that the upload request succeeded. For example, if you are using three replicas, at least two of the three writes must be successful. Afterward, the container database is updated asynchronously to reflect the new object in the container [5].
Downloading (GET)
A request comes in to the proxy server process for /account/container/object . Using a lookup in the appropriate ring, the partition for the request is determined, along with the set of storage nodes that contains that partition. A request is sent to the storage nodes to fetch the requested resource. Once the request returns the object, the proxy server process can return it to the client.
URL Naming
Cluster Location (swift.example.com/v1/) :
The first part of the storage URL is an endpoint into the cluster. It is used by the network to route your request to a node with a proxy server process running so your request can be handled [4].
Storage Location (/account/container/object ) :
The storage location is composed of one or more identifiers that make up the unique location of the data. The storage location might be one of three formats, depending on which resource you are trying to reach with your request.
API Usage Methods
There are several ways of using the Swift API:
• cURL: using HTTP requests
• Switftclient CLI: a low-level command line utility for communicating with an OpenStack Object Storage (swift) environment
• python-swiftclient: offers a higher-level API
• OpenStack Swift SDK for high-level programmign languages
The steps to using either client/api will generally follow the same pattern:
• authenticate user by sending request to authentication service to get a token.
• sending an HTTP request to the target v1 endpoint with your authenticated credentials.
Python-swiftclient
The python-swiftclient is a command line utility for communicating with an OpenStack Swift environment. It offers a high-level API allowing developers an easy way to perform multiple operations asynchronously using a configurable thread pool [6].
An example of how you would perform authentication like in the above cURL example [10]:
_authurl = 'http://127.0.0.1:5000/v2.0/'
_auth_version = '2'
_user = 'tester'
_key = 'testing'
_tenant_name = 'test'

conn = Connection(
    authurl=_authurl,
    user=_user,
    key=_key,
    tenant_name=_tenant_name,
    auth_version=_auth_version
)
Closing Remarks
OpenStack Swift, which is itself, just one module of many that make up OpenStack, has numerous components. Many cluster configuration steps were not covered in detail as they involved mostly tinkering with configuration files, setting environment variables, and installing necessary software. I thought a higher-level view of how Swift works would be more suited for a blog post. Each one of the sections covered above (and many that weren’t), such as data replication, auditing, authentication and API usage could be explored deeply on their own. Please check in soon for a in depth discussion about how object replication/synchronization works in Swift. There are many areas I did not touch on at all in this post, like AWS S3 compatibility and details about the high-level Swift SDKs available in most server-side languages. There are also many tuning/monitoring/logging tools available. I have learned a lot in this project and have a new found respect for linux system administrators and network technicians. This project has also piqued my interest in the distributed algorthms used in data replication/cloud architecture.
Thanks for Reading! --- @avcourt
Questions? Join my Discord server => discord.gg/5PfXqqr
Follow me on Twitter! => @avcourt